Sure, they were nice for Halloween and Thanksgiving. But let’s be honest – those pumpkins just don’t have a home in your nativity scene or under the Christmas tree. Never fear – donuts & denim to the rescue!
Super Easy Homemade Pumpkin Puree
There are some things that are just easier to buy pre-made. I’m all for shortcuts that make life easier. But making your own pumpkin puree is as easy as pie! (Seriously, if I can do it…anyone can.) Normally, I just throw my fall decorations out. However, this year it was my goal to actually DO something with them. It’s a really quick process and the end result can be used in all kinds of cuisine. I’m going to use mine for smoothies, cookies, pies – it’s hard to say what will happen!
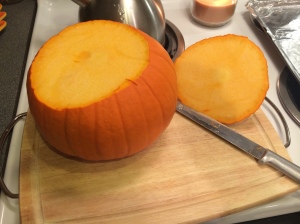
Step 1 – Greet your little pumpkin. I liked using a smaller one to keep it more manageable. But if you have a 20 pounder, go for it. May the Great Pumpkin be with you. Lop off his top. He won’t feel a thing.
Step 2 – Cut the pumpkin in half and then in quarters.
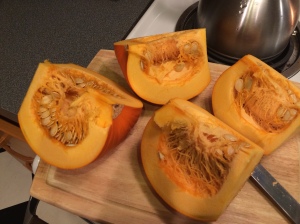
Step 3 – Now comes the fun (slimy) part. Use a spoon (I used an ice cream scoop) to scrape out the seeds and innards of your pumpkin pal. Try to get out as much of the stringy stuff as possible. But if you can’t get it all, don’t sweat it. But save those slimy seeds. Believe me, you want to.

I’ve been gutting pumpkins like a boss since the late ’80s. Listen to a pro. Using a scoop will help avoid getting those green sweatpants dirty.
Step 4 – Roast the heck out of the pumpkin. Place the quarters on a baking sheet and roast in a 350 degree oven for 45 minutes or until the pumpkin is tender when poked with a fork. While you wait, dance around to Taylor Swift.

Ignore how terrible this picture is, please.
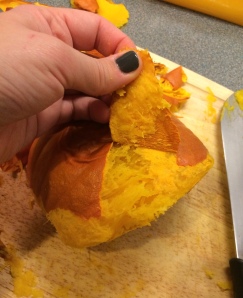
Step 5 – Let the little guy cool. This step is for your safety. I learned this lesson so you don’t have to sacrifice your finger pads. After 10 minutes or so, the skin of the pumpkin will be easy to just peel off. You might need a knife to help.
Step 6 – Cut up the pumpkin and toss it in your food processor, Vitamix, blender or just mash it up in a bowl. If it’s a little dry, add in a few tablespoons of water. The Vitamix works magic. But more on that later.
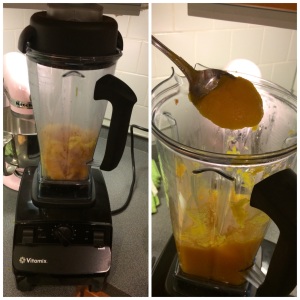
Vitamix = ❤
Step 7 – Once it’s pureed, distribute the pumpkin to freezer bags or another container. Make sure you put measurable portions in each bag so you know how much you are working with later. Freeze it, use it now – regardless of what you do, enjoy the fruits of your labor!
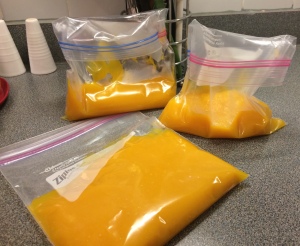
Ta-da! Easy, right?
**Thanks to Pioneer Woman for guiding me through this entire pumpkin puree journey.
-bb